Weekend Project: Front Walkway with Pavers
For the most part, the work in the master suite is all done and we have moved back up there. It is nice to be back in a room with lots of windows, light, and air circulation. Ahhh.
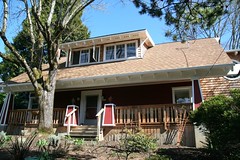
This weekend's project is the front walk. The city inspector said we had to have better hard landings on each of our exterior steps before we can close the building permits. Whatever. From almost the day we moved in, I've wanted to put a cobblestone path from the street to the house. Since then, we've added a 36' front porch with cedar stairs, terraced the front yard, and added flagstone steps. Now, we need a path from the flagstone steps to the front porch.
Before:
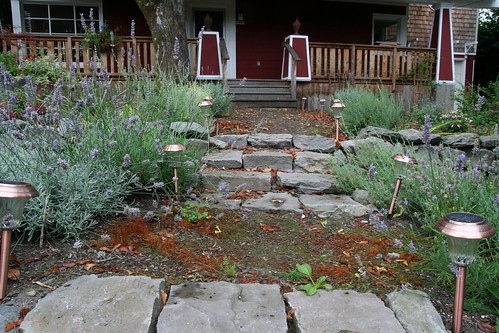
Here you can see the flagstone steps in the foreground and the front porch with steps in the back.
Although there are several steps in putting down pavers, it is reasonable to expect to be able to do 100sf in a day with 1-2 people.
1. Excavate. You need to dig down far enough for 4" of crushed rock, 1" of sand, and however tall your pavers are, which for us was 2". So, did I dig down 7"? No. As you can see from the picture, there is a large maple tree right next to the front steps and I'm not digging up all those tree roots just for this path. I did my best, which was about 2-3".
2. Lay down landscaping fabric. Landscaping fabric will help prevent weeds from growing up throw the pavers and disrupting your path.
3. Spread out your 4" of crushed rock (I did between 2-3"). I've read that we should use something called 3/5" minus, which basically means a bunch of bits that are no larger than 3/5" plus a bunch of dust. I ended up using 1/4" minus based on a local vendor's recommendation.
4. After your have carefully spread and graded you crushed rock, realize that you have skipped step 2. Yell a few choice words, and then decide you ain't ripping that crushed rock out and decide you can live with a few weeds.
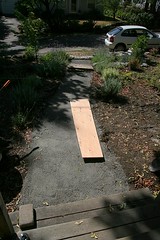
5. Pound down the crushed rocked with one of those obnoxiously noisy gas powered vibrating compactors that you can rent from one of those agonizingly incompetent big-box stores. I skipped this step and instead experimented with laying down strips of plywood that I jumped up and down on for a while. Some of the passing pedestrians looked at me funny, but I think it worked well enough.
6. Spread 1" of "paver sand". I think pretty much any old garden sand will do. However, you probably shouldn't use beach sand, because it has salt in it. Carefully grade with a long strait edge. I used a 4' level. If any of the rock shows throw, cover with more sand and start over.
7. Begin placing pavers while trying not to touch the sand. If the neighbor walks by with his curious dog, yell at them if they get too close to your sand.
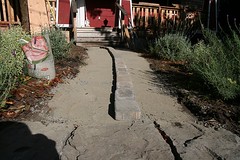
8. Once all of your pavers are set, dump a bunch more of that "paver sand" on top of the pavers and work the sand in between with a push broom. I did a simple "subway tile" type pattern, starting in the middle and working out. This was slightly complicated by a slight arch in the path that goes around a few choice tree roots.
That's about it. I got most of the pavers put down today, but I forgot to get a stone chisel and didn't think I could cope with a trip to Hell Depot tonight. I'll try again tomorrow.
Until then, here are some pics.
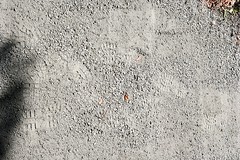
1/4" minus crushed rock:
The Plywood Method
The First Row
Beer:30
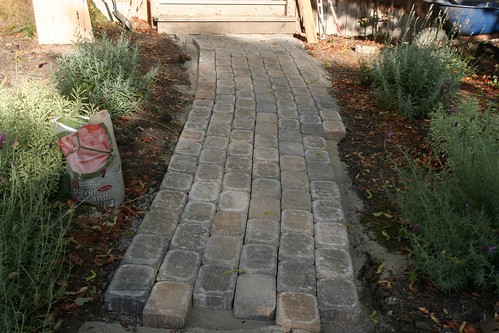
As you can see here, since each row is offset from the other, there are gaps at each of the row ends. I'll need to use a rock chisel to whack a few pavers in half to fill those gaps. Once that is done, I can spread some sand and call it done. Not bad for a weekend.
posted by Greg at Saturday, August 11, 2007
![]()
![]()
NOTE:Comments that appear to promote commercial web sites will be deleted.
0 Comments:
Post a Comment
<< Home