Sunday, January 18, 2009

Done!

Done! We are done! Done with William's room. Done with the upstairs addition. Done, done, done, done, DONE!

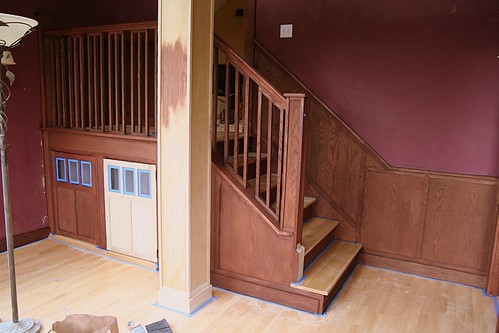
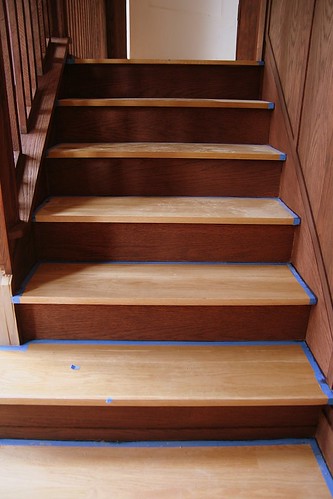
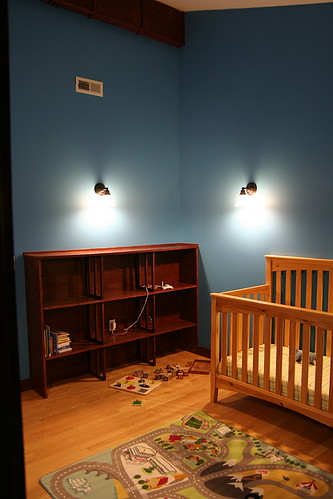
First, a few pictures of Williams' room before some final thoughts.


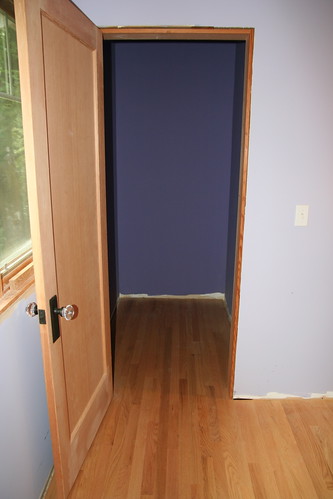
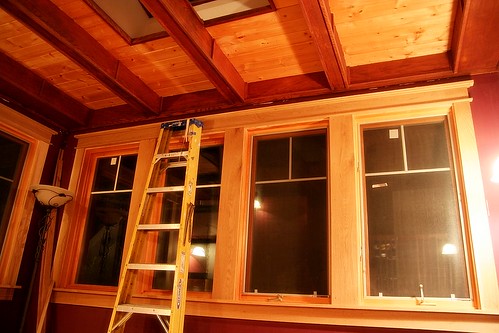
Here is the view from the doorway. The window casing turned out especially well.


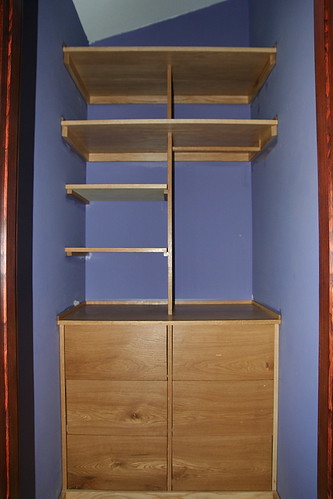
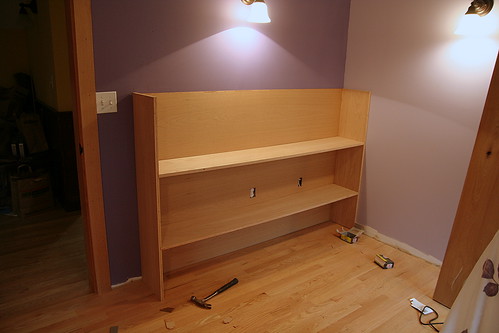
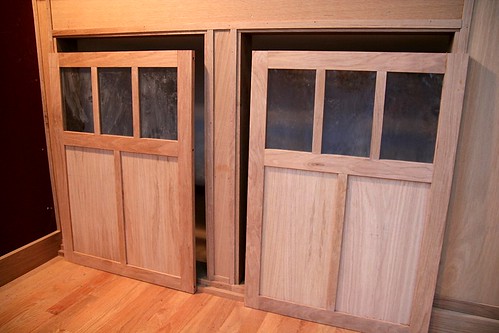
This is a view from the closet. I'm very happy with the built-in shelves.


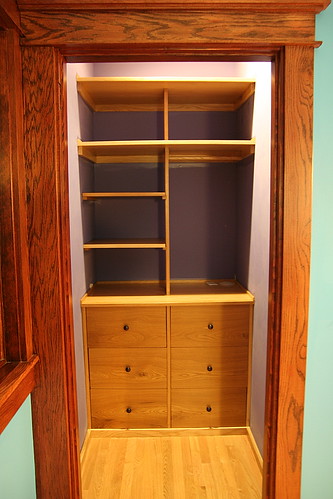
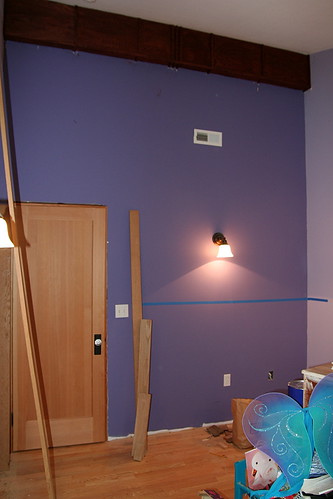
The finished closet including drawer pulls. As much as I want to throw my hands up in the air and declare victory, I probably should repaint the walls inside this closet. The old purple paint looks pretty bad. Then again, it's just a closet...

Final Thoughts


To be honest, I'm not sure if this is my last entry or not. There certainly is a lot of work left to be done on this house. As much as I want to say the upstairs is absolutely done, there are a few things that I left undone. I never put down shoeing, the quarter round trim that goes between the baseboards and floors. I will do that some day. I never finished the doors. The original doors still have white paint that needs stripping (I hate stripping paint!) and the new doors are still unfinished raw wood. There are a few other things like that I will get done. Someday.

The first floor is still half baked as well. We need a new kitchen, badly. The cabinets are crap, the counter tops are plastic as is the floor. I've debated moving the kitchen to where the dining room is, but am still uncommitted. Either way, there is a lot of work to be done there as well as in the dining room, wherever they end up. Someday.

Also on the first floor, the bathroom needs updating. Or, perhaps backdating is closer to my ultimate goal. I'd like to give it more of a period look with tile floors and a bearclaw tub, for a start. In addition, the adjacent room we now call the library, which used to be our bedroom, could use some built in shelves, new window casings, and perhaps an exterior door. Someday.

And, don't even ask me about our basement. It is a disaster. There is a lot of potential for a family room, media room, music room, whatever. But, for now it is just wasted space. It needs heat and floor covering. Someday.

For now, however, I'm happy just to be done.

Thursday, December 18, 2008

Snow!

Snow here in maritime Portland is not very common. We might have 1 or 2 days of snow per year, or go an entire winter without any at all. This week, however, we’ve had quite a bit. We got about 5” on Sunday and have had snow off and on every day since. There is more snow in the forecast through next week. It's a lot of fun at first, but now that the novelty has worn off, I'm ready for it to move on. Still, I never pass up a chance to get yet another shot of the house with snow.

William’s bedroom is almost done. The carpentry and staining are done. All that is left is painting the walls and brushing the finish on the closet built ins. This is the last room upstairs that needs work. After this, we will be officially done with the 2nd story addition. Whew.


I didn't stain the woodwork in the closet, which is consistent with the rest of the house. As soon as I'm done brushing on the finish, I'll mount the drawer pulls.

Saturday, August 09, 2008

William's Bookshelf

Today, I had some time to work on William's built in bookshelf. The basic idea is a shelf that is 6ft wide, 4ft high, and 1ft deep. I'm building this out of 3/4" cabinet grade white oak plywood. Here is where I'm at...

I ripped up a sheet of 4x8 plywood. There will be 2 4ft high sides and two 6ft long shelves. The 2 sides will require grooves for the shelves to fit into.


I'm fortunate that my table saw has a sliding miter table that words pretty well for cutting grooves. I just set the saw blade height to 1/4".


Here is what the 1/4" groove looks like.


Here are the two sides, I just need two shelves to fit into those grooves.


Here I have the sides up and the shelves in place. I put some 1/4" oak ply on the wall behind the shelves. Next, these shelves need a top, but I'm also going to put some braces between the shelves to improve the strength. This unit is for a little boys room, so it is only a matter of time before he decides to climb it. The shelves better be ready...

Saturday, August 02, 2008

Next Project: William's Room

Now that William is a teenage (15 months old), he's been clambering for his own room. And, we're very receptive to the idea. Only problem, his room is not trimmed yet. So, that's the next project. In addition to the usual baseboards and casings, I'm going to add a built-in bookshelf and built-ins for the closet.

First step was getting some more lumber. I got 4 sheets of cabinet grade 3/4" white oak ply (4x8), and 200bf of variable width 1" white oak boards. My careful calculations determined that I would need 2.835 sheets of plywood for the shelving, so I got 4 sheets because my careful calculations are usually wrong... No, I don't need 200bf of oak just for William's room, but I will definitely use the rest when I redo the casings downstairs (next next-project).

Since I'm just now getting geared up, here are some "before" photos. Let's hope I have some "after" photos before the end of the year.


Yes, that's a standard sized door. Although this room is only 10ft wide, the vaulted ceiling is 12ft high. The blue tape to the right of the door represents the bookshelf that I plan to build. It will be 4ft high and 6ft wide.


This bank of windows will get the usual Craftsman style casings like the rest of the house.


This is a modest closet at about 3ft wide by 5ft deep. I plan to put a simple system of drawers, shelves and hangers similar to those in our closet.


That's what 200bf of 1" oak and 4 sheets of oak ply look like. Btw, Crosscuts delivers for free in the Portland area, which is great considering I don't own a giant flatbed truck.

Update: Sunroom Done!

Well, I think I can finally call the sunroom done. Last week, I put the final touches of paint with brush and roller and that was it. In general, I'm happy with the outcome. However, I can hardly believe it took about 4 years (off and on) to get to this point. My only concerns are that the stain on the storage area doors and on the main column didn't turn out very even. I'm going to just leave it for now, but may decide at a latter date to redo them.

Something else I'd like to mention is that this was the first time I painted walls without masking tape. And guess what? It turned out SOOOOO much better!!! A friend of mine had their interior painted by professionals and he was surprised to see that they didn't use masking tape. I have been frustrated that, no mater what kind of masking tape I use, or how carefully I applied it, the paint always seemed to leak through a bit. This time, I just took my time and carefully cut a line with the brush. The trick is to start about about an inch from the trim, then move down and closer to the trim until you are just touching, then keep going until the brush runs out of paint. Then, do it again. It is easier than it sounds. I will never use masking tape again.


Now some pics:


The sunroom is over the garage and the floor is about 3ft lower than the rest of the 2nd floor. This means a short flight of stairs. The original plans called for the "railing" to be a solid wall and the area under the stairs to be enclosed. However, I decided to make the railing open spindle like the main stairs and to open up the area under the stairs for storage (who wouldn't?). Unfortunately, Jenn has already claimed every square inch of the storage area. sigh.


One thing I wasn't sure about but decided to leave in the original plans is this large circular window. I just don't think it looks "Bungalow". Some square and open-able windows probably would have been better. That said, most people who come visit say they love the circular window. So, what do I know?


The original plans called for tongue-n-groove pine ceiling with rough fir beams. After the beams were up, with metal hangers, I didn't like it. I tried sanding them to make them look cleaner, to no avail. So, I decided to cover them with 1/4" white oak ply. This, much to my surprise, created a more traditional box-beam look, which I'm pleased with. Happy accidents are fun.


Another change, actually suggested by the builder, was to change the flat ceiling over the stairs to open vaulted, which matched the rest of the 2nd floor. This left a curious triangular space that we decided to put two fixed framed triangular windows. This looks great and adds even more light, but does seem to draw the heat out of the room during cold weather.

Monday, April 21, 2008

Weekend of Stain: Sunroom Edition

This weekend was the big weekend of stain for the sunroom. Jenn took William to the coast while I stayed at Hillsdale house and generated a toxic cloud of staining fumes (the house still stinks). The result? After 14 or so hours of brushwork, I ran out of stain. But, I got everything but one of the doors to the storage area and the support column stained. Below are some pics. Tonight I got the last bits all stained and I think I can call this phase complete (however, I didn't get any more pictures with everything stained yet).


Here is the quarter view of the stairs and storage area. Daytime pictures of the window casings didn't turn out so well because of the backlight. I'll try and get some evening or night pictures of them.


One of the few things I learned from HGTV before I decided it was stupid and stopped watching is the term "pops". As in, staining your risers and treads contrasting colors really pops. Actually, I just thought the treads would be easier to see while walking around in dim light if I didn't stain them a dark color. I made that decision with the main stairs and copied it here.


Inside the storage area, I laid down some left over 1/4 oak ply and finished it without stain. I really like how it turned out. It's a shame it will likely always be covered.

Before shot:

Sunday, March 23, 2008

Sunroom Progress

I was able to work on the sunroom this weekend, the first time in a while. The current focus was a pair of doors for the storage area under the stairs. I got them built, but didn't have time to mount them. I hope to pick that up during the week or next weekend. I'm pretty much done with the carpentry work and will start the finish work soon. The room is going to need a lot of sanding... I'm still optimistic that I can have this room, plus Williams room done before his 1st birthday in May.

Here's some pics:

The Two Doors


Wide View of the Stairs


The "Before" Pic

Sunday, February 17, 2008

Sunroom At Night


I've been working on the sunroom trim recently. Hope to finish up with the carpentry phase soon so that I can start the sanding. There will be much much much sanding. The biggest tasks left for the carpentry are the glass doors to the storage space under the stairs. At least the wainscoting is complete.