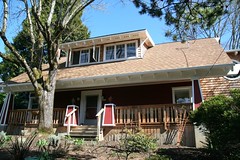
Sunday, October 28, 2007

Rediscovering the Storm Windows

When we first moved into our house, I noticed that there were some strange wooden storm widows in the the garden shed. I might not have figure out what they were for except that they had labels written on them like "master bedroom," "bathroom," etc, and they had hooks on them that matched brackets on the house. The first fall we were in the house, I dutifully retrieved the storm windows from the shed and mounted them on each window as the labels directed.

However, I was pretty unimpressed with their performance that winter. During our first spell of the infamous "East Winds" (which have their own ominous theme music), you could feel a cool breeze coming through the gaps near the windows. "These things are a waste of time," I thought. The next winter, I tried some of the plastic wrap window stuff that I had seen promoted on one of those "House Tips" segments on the local tv news. An absolute must for old houses, they promised. These are those sheets of plastic that you mount with tape and then use a hair dryer to get the wrinkles out. I did this. However, the first time the cold east winds returned, off came the plastic. What a waste. I no longer get house tips from the local tv news.

Since then, I've not tried much. The east winds blow each winter and we maybe put towels around the windows, which don't work so well. As a result, we've had some pretty high heating bills. This year, I resolved to solve this problem once and for all. The plan was to remove the glass from the crappy old two piece frames and build new single piece frames that would fit into the same grooves as the old ones. I'd seal up the glass panes and mount the frames with foam weather stripping.

Day 1, I get the old windows out of the shed and start to look at them. Building new frames was starting to look like a lot of work and these old frames looked better than I had remembered. Maybe if I just got the foam strip insulation, I could make them work after all. I went ahead and mounted the storm window for the bathroom, which faces east, but ran out of time before I could start any more. Last week, we had a minor spell of the east winds and I was pleasantly surprised to find no sign of air leaking inside the bathroom. Hmm, I may have something here. Today, I had just enough time, and stripping, to get the rest of the east facing windows mounted. I'll need to get some more stripping and do the rest of the downstairs windows.

Before (bathroom window)


After:


The bedroom windows


They don't look great, but I think they will be effective this winter. Next year, I can always clean them up better and repaint them. They sure beat the heck out of paying a brazilion dollars for replacement windows.

Note also that these windows can be opened from the inside to allow safe egress in case of fire.

Labels:

Sunday, October 14, 2007

Weekend Project: The Bike Door

Today I was able to get the door mounted and trimmed for the bike storage under our main stairs. This completes the carpentry phase of this project. I will need to stain and finish the wood the next time Jenn takes William out for a weekend.

Saturday, I got the glass mounted in the door. It took longer than I had hoped, because I cut the glass a bit long. If you've ever cut glass, you know that it's hard to cut less than a half inch off. You can either snip at it, or grind it off. I decided to go buy a grinder. I know I'll be needing it again.

Here is the door. I put it on the front porch to get the picture.


Here is the door in place. I like how this all turned out.


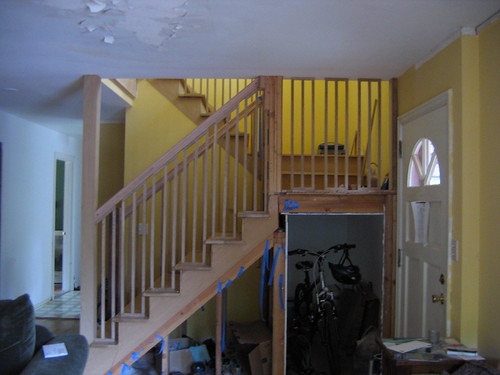
Here is the "before" shot taken two years ago. Wow!

Tuesday, October 09, 2007

Portland on Google Street Views

Google Maps now has Street Views for Portland. I think this is very interesting, though it certainly spooks a lot of people who are concerned about privacy. However, I like the idea of checking out neighborhoods at ground level. This would have been an excellent tool when we were house hunting.

Here is the shot they took of our house.

Labels: ,

Sunday, October 07, 2007

Weekend Project: Coat Closet w/ Bike Storage

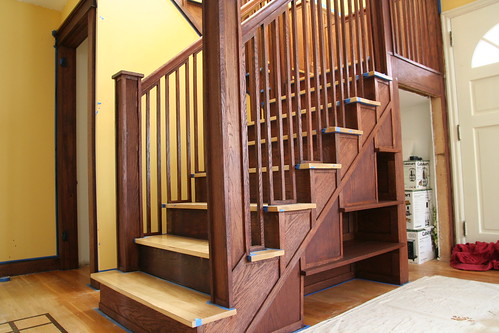
This weekend's project was to trim out a coat closet and make it functional. But first, some background. We have a strange L shaped area under our new main stairs. On the left is a full-height doorway that that reveals a conventional sized closet area. However, behind that space is a some left-over area that's 4 feet high, 3 feet wide, and 8 feet deep. This area was described by the architect as "storage space" accessible through the back of the closet. However, I had the builder leave a 3x4 foot area open to the right that is adjacent to the front door. At some point, it occurred to me that this space would make a great place to park a couple bikes, or a "Bob" brand baby stroller. Part of this weekend's task was to not only make the left side functional as a coat closet, but also to build a door for the "bike storage" area.

Unfortunately, I didn't finish. Saturday, I cut my stock and started to assembled the bike door and a jam. I mounted some trim and built a shelf. Today I mounted two coat rods and got the doorjam in place, but didn't finish the door. The plan is to put 3 panes of glass above the 2 panels, but I didn't have the right dimensions of glass on hand. So, this week, I'm going to go to the glass store and get some more. But, I should be done with the closet (minus the wood staining) by next weekend.

Here is the coat closet emerging...


Here is the bike storage door (before glass)


Here is a wider view of the stairs taken earlier this year while I was still staining. You can see the closet doorway on the left and the "bike" doorway on the right.

Labels:

Thursday, October 04, 2007

A Craftsman Kitchen?


I've been thinking a lot about kitchens recently. I've never liked our kitchen. It's small, cramped, and ugly. This week, I started getting bids to have our kitchen remodeled. The thought was that I would work on the millwork upstairs while some pros took care of the kitchen downstairs. I thought the first bid was a bit high at $20K, but the second one came in at a whopping $50K. It's looking more and more like I'll be doing most of the kitchen work myself.


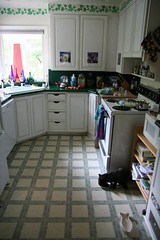
Our Current Ugly Kitchen

Woof!


The plan is to move the kitchen from it's existing location in the southwest corner of the main floor to an adjacent room in the southeast corner. This new room was originally a bedroom and is a mere 12'x10'. But, that's the best we can do without building yet another addition.

I don't think I'm asking for a lot. I'm not hoping for a lot of whizbang, geewhiz, heart racing gizmodo. Just a place for cooking and storage. No island. No breakfast nook. There's no room. Just sink, fridge, range, cabinets, counter tops, and lighting. That's shouldn't cost a lot, should it?

I do want the kitchen to have a period feel. It may not look like a hundred year old kitchen (they were pretty sparse back then). But, I do want to borrow from the styles of the early 20th Century Bungalows. The new kitchen will have a simple, galley style layout with cabinets and counter tops on both sides. I would like mission-oak cabinets. I would like mini-pendant lighting (even though the low ceiling will provide a challenge). I would like a natural stone countertops (those DuPont creations clash with the all-natural Arts and Craft creed).


I know there are a bunch of books out there on the subject. I haven't bought any of them. I am just now beginning to go through our local library's collection. The library has plenty of books on the subject and some of them look promising, helpful.

I have time. I don't even want to start working on this until after the New Year. By then, I hope to be completely done with the millwork upstairs and will be able to focus entirely on our new kitchen.

Labels: