Friday, July 30, 2004

Notes on Wood Floors Class

I went to the wood floors class last night and I’m pretty happy with it. I definitely have a better feel for the process and can hardly wait to actually have some floors that I can finish. Here are some interesting things that I learned.
The drum sander is easier than I thought. I played around with it and, although it really tugs when the drum is down, it’s not at all hard to get an evenly sanded surface. You just have to remember to be moving when you drop the drum, always walk at an even pace, and always lift the drum if you stop or need to change direction. He recommends that you break every room into two halves, start in the center, then move towards the wall you face. You want to sand each run twice, first forward, and then back. So, to recap, you turn the sander on, start walking, drop the drum, sand until you are close to the wall, then lift the sander, start walking backwards, then drop the drum and sand until you are roughly back at the center of the room. For new floors, I learned that, on the first pass with the 40 grit paper, you should sand the floors at a 45 degree angle to the boards. This will help to even the heights of the floor boards. This is only for the first pass. After you are done, you should sand again with the 40 grit parallel to the boards. All subsequent sanding with the finer grits should always be done parallel to the boards.

The edger wasn’t too hard either. It’s just a circular sander. It does fight a bit, like the drum sander, but it’s manageable. The instructor did say that it will ware out your back, since it involves a lot of bending over. I think I can manage the edger.

The buffer wasn’t too bad either. A few people had a hard time keeping it from running away from them, especially when they first turn it on. I found pretty quickly that it you rock it back and forward, by moving the handle up and down, that you can quickly find the balancing point and then control it from there. There was at least one woman who just couldn’t get the hang of it. She would turn it on and it would take off. So, she would quickly turn it off, drag it back to the center of the area, try again and it would take off again. I don’t think she ever got the hang of it. But, they also have a square vibrating buffer, which is easier to control, though they say it takes a lot longer to cover the same area as the circular buffer. I’ll probably get the circular buffer.

They didn’t spend much time with the finish, which was a bit of a disappointment since I’m more worried about it than the sanding. I probably should have written that in the class review form. He only had time to apply the sealer, though he said the subsequent two coats of finish is applied the same way. He did make it look easier than the video, using an applicator on a long pole. I’m going to follow them rather than the video. They did talk about the option of two different kinds of sealer. There is a water based sealer, which adds no color and leaves a natural wood look. And, there is an oil based sealer, which leaves a golden color. Although I’m inclined to use the water based, I did think the samples they had of the oil based did look nice. The instructor said this gives the floors a more classic look, since it is more like what they use to finish the floors with. So, I want a house that has a ‘classic’ look, but I also want the floors to match as close to the 1st floor as possible. I don’t know what was used on the first floor, but I would guess it was a water based sealer. Either way, the final two coats will be done with a water based polyurethane. I can hardly wait.
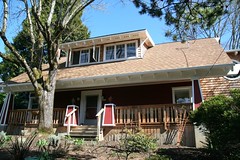
Thursday, July 29, 2004

Yet Another Office Color

One week later and it doesn’t seem like much as changed. But, at least we have color in each of the rooms. We got a new color for the sunroom, which looks almost exactly the same as the old color that we can hardly tell the difference. We painted a blue color in the office. Technically it is cobalt and it looks pretty good with the yellow ‘cane’ of the hallway. We have a color for the second bedroom. Two, actually. It is a light lavender and a matching darker lavender. It looks ok, but Jenn seems a little disappointed. I think we both agree now that the important thing is to just get beyond this paint phase and move on to bigger and better things like electricity, flooring, and functional bathrooms.

Speaking of flooring, the last of my two classes on wood floors is tonight. I will be learning about sanding and finishing the flooring. I’m hoping to get more hands on experience this time than I did last time. Last class was mostly lecture with only a few short minutes playing with the flooring hammer. Getting some time with the sander is my primer reason for taking this class. I want a chance to feel how the sander behaves before I start running it up and down my own floors. Hopefully I can really do this.

Thursday, July 22, 2004

Burned by Orange Paint...

Painted more last night. It became evident that the idea of painting the beams above the upstairs hallway the ‘burnt orange’ color was a mistake. It looks laughably bad. I proposed to Jenn that we either paint it white or the cane color, or some other accent color. I still like the idea of painting the ‘office’ area a different color than the cane, but Jenn doesn’t seem that interested in the idea.
The jury is still out on the sunroom color. Clearly it is not the color that either one of us thought it would be. Instead of a warm rich red, it’s more of a dark eggplant purple. I don’t think Jenn is happy with it, but I’m willing to keep it, at least for a while.
We still need to pick a color for the second bedroom.

Monday, July 19, 2004

Orange Paint, Part 1

Not much to report. We were in Seattle this weekend and didn’t work on the house. Jenn did do some painting on Thursday before we left. The dark blue in the bedroom looks complete, or at least very close. I went and got some more color from Miller. I got a gallon of the ‘Fired Orange’ for the hallway, a gallon of the ‘Garnet’ for the sunroom, and another gallon of the dark blue. I should have only got a quart of the dark blue, but I got more so that I could paint a wall in the bathroom. But, then I realized that we should only use paint with sheen, such as satin or even eggshell, in the bathroom because it can better handle getting wet. Oh well. Maybe we can use it in the basement…

Thursday, July 15, 2004

Painting Under Stairs

Painted primer in the closet under the main stairs. I made a point to paint the smooth walls before I painted the textured ceiling to prevent the texture from getting all over the walls. It seems to have worked. Great, now we’ll have smooth walls: in our closet… After I cleaned up the paint tray I realized that I forgot to paint primer under the stairs in the sunroom. Oops, I guess I’ll have to do this when I finish the primer in the sunroom. That is the last of the interior primer.

Jenn took the day off. She went to Miller paint to get a color match on some yarn she likes. It’s kind of a reddish copper color called cinnamon. But, the Miller guys refused to color match saying they can’t use the machine on fabric. Jerks! As much as I hate patronizing big box stores, Home Depot says they color match anything. Jenn still managed to get a quart of color that looks pretty close to the yarn. We’ll see how it looks after we get a couple coats on the wall.

But, we’re going to Seattle this weekend so we won’t be painting.

Tuesday, July 13, 2004

Painting Again

Got back to painting again last night. Jenn and I painted quite a bit. I worked on brushing the master bath corners and Jenn had roller duty in the upstairs hallway. After she was done, I took over the roller and did the stairwell. Today, as I look at our handy work in good light (we worked until nearly 11pm with just a floor-lamp for light), I can see that we will definitely need at least a second coat. I also noticed that the brush work I did in the bathroom didn’t really improve things much. Grrr. Not quite sure why. But, the whole white-on-white thing is kind of hard to pull off. I’d rather paint color. Plus, I think just leaving the bathroom white is a mistake.

Friday, July 09, 2004

Porch Stairs

Ah, haven’t been able to log much lately. However, I have been able to spend most of my evenings working on the house. Probably the main achievements have been made on the porches. I wrapped the stairs and put down decking on half of the front porch and part of the back porch. I’m impressed with the stairs. I decided to use 1x cedar fencing for the risers and the sides of the stairs. I started off by just covering the outdoor wood on the front stairs, but soon discovered that it was better to extend the fence boards clear to the ground, enclosing the space underneath the stairs to prevent critters from getting in under there. I did the remaining stairs this way but will need to return to the front stairs to get this part right. I also decided to cut the treads flush with the edges of the stairs, without overhang, so that I can tack on some trim on the edges. This will cover the butt end of the boards and I think it will look nice and professional.

I ordered some 12’ and some 18’ 2x6 cedar decking from Parr Lumber. The 12’ boards were very nice, but I have to say the 18’ boards were kind of dirty and ‘old’ looking. It looks like at least some of the 18’ boards were left out in the sun and rain for several months before it was delivered to me. I know some light sanding will make them look better, but I’m a little disappointment that I will need to do this. I’ve got enough to do already…

The painting still limps along. The master bedroom has been painted, but much of the brushwork didn’t turn out that great and will need at least one more coat. I still haven’t done much with the hallway, but I hope to tackle it this weekend. I still need to paint primer on the edges of the stairwell and below the stairs for the closets walls. Also I’ve noticed that the initial painting left a lot of texture grit on the walls which need to be sanded off. This has been a huge pain in the ass. I’m going to have to sand parts of the master bath and hall ways too. Lots of work. Although we are going to paint the yellow ‘cane’ color of the living room in the stairwell and hallways, Jenn found some ‘copper’ colored yarn that she wants to use as the color for the upstairs ‘office’ area. The copper color seems to compliment the cane very well and will help to break up the abundance of the cane color. Mostly, I just can’t wait to get this house painting so that we can get the electricians back and move on to other projects.

Speaking of other projects, I attended my first of 2 wood floors classes. The class was pretty elemental, but I did pick up a few details and got to practice with the power nailers. I was a little scared at one point when the instructor said that you absolutely cannot nail into particle board sub floor. However, it turns out that our sub floor is not actual ‘particle’ board but a chipboard call OSB (oriented strain board). He said that particle board would have to be replaced or covered by ¾” plywood, neither is really an option for us (whew!). I also got a chance to figure out more accurately what grade of flooring I will need. I thought I could get away with what they call common #2 (which is relatively cheap but varies in color greatly), but after seeing some samples I’m pretty sure that I will need at least #1, but more likely ‘select’ grade 2 ¼“ white oak. I also learned that I will need to use the air-compressor power hammer as the manual hammer is far too difficult and exhausting to do nearly 1000SF for one person. I can rent the air-hammer and compressor for about $70 a day. I can hardly wait!